Contents
About the Principle of Screen Printing
Screen printing is a versatile technique that uses a mesh to transfer UV ink, Solvent ink or dye onto a surface, with specific areas blocked by a logo stencil to control where the ink goes. A blade or squeegee sweeps across the screen in a “flood stroke” to fill the open mesh areas with ink. Then, a reverse stroke presses the screen briefly onto the surface, transferring the ink. As the screen frame lifts, the ink is deposited onto the products, leaving the desired design logo.
About color and mesh
The process prints one color at a time, requiring multiple screens for multi-colored images or patterns. Traditionally, silk was the material of choice for the mesh, but modern printing often uses synthetic materials like polyester, which is the most common. Other specialized meshes, such as those made from nylon or stainless steel, are also available for specific needs. Mesh size is an essential factor that influences the level of detail and appearance of the final design.
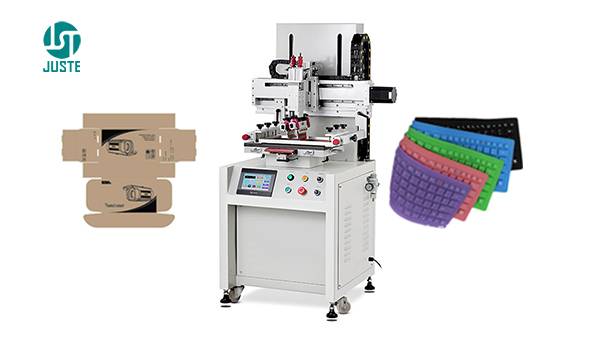
Screen Printing applications
Screen printing is widely used across various industries and products. Common applications include printing on decals, clock faces, watch dials, balloons, milk tea cups, cosmetic bottles, pipes, and glass bottles. It is also used in advanced fields like producing multi-layer circuits, where conductors and resistors are applied to thin ceramic substrates.

A: What is silk screen printing squeegee?
1 A screen printing squeegee is a tool used in the screen printing process to apply ink onto a substrate through a mesh screen.
It consists of a handle and a rubber or polyurethane blade. The squeegee is moved across the screen with pressure, pushing the ink through the mesh onto the surface of the material (such as fabric, paper, or plastic) to create a design.
The blade can have different shapes and hardness levels depending on the printing needs, and it helps ensure an even, consistent application of ink for high-quality prints.

A1: Flat Squeegee
This is the most commonly used shape, offering a certain level of compliance and capable of withstanding high pressure.
A2: Pointed Squeegee
This squeegee has good flexibility and compliance, reducing pressure. It is suitable for printing on very uneven surfaces or irregularly shaped items, such as cylindrical products like cosmetic bottles, cups, etc.
A3: Bevelled Squeegee
This type combines the characteristics of both flat and round-tip squeegees and is less prone to chipping or damage.

Poducts name: Screen Printing Squeegee
Material: PU
Shape: Flat Squeegee, Pointed Squeegee, Bevelled Squeegee.
Size mm: 50*9*4000mm, 40*7*4000mm, 35*5*4000mm, 30*9*4000mm, 25*5*4000mm
Hardness 55, 60, 65, 70, 75, 80, 85, 90 Degree
Squeegee Application:
By applying pressure, the screen is brought into contact with the surface of the substrate, allowing the ink to flow through the mesh and make contact with the material, transferring the design onto the product.
Storage: After use or if not in use for an extended period, clean the squeegee blade thoroughly with water or screen wash. Store it in a cool, dry place to extend the lifespan of the rubber strip.
B About screen printing Ink
Screen printing uses various types of inks, each suited for different materials and printing applications. Here are the most common types of inks used in screen printing.
B1: Solvent-Based Ink
These inks are used for printing on non-porous materials such as plastic, metal, or glass. They contain solvents that evaporate as the ink dries, leaving a durable and resistant print. Solvent-based inks are commonly used for industrial and outdoor printing.

B2: UV Ink
UV inks cure when exposed to ultraviolet light, making them dry instantly without the need for heat. They are typically used for printing on materials like plastics, glass, and metal and offer excellent durability and a high-gloss finish.

C Logo Stencil
In screen printing, a logo template refers to a pre-designed graphic file or stencil that is used to print a logo onto a product or surface.
It serves as a guide for transferring the logo design onto the substrate (such as fabric, plastic, or metal) through the mesh screen during the printing process.
The template typically consists of a high-quality vector image of the logo that is prepared for screen exposure, ensuring that the design is sharp, clear, and aligned properly when printed.
Here’s a brief breakdown:
1. Design Preparation:
The logo design is usually created in vector format (e.g., Adobe Illustrator), ensuring that it can be scaled without losing quality. The logo is then separated into individual color layers if necessary.
2. Film Exposure:
The design is printed onto a transparent film or directly onto a mesh screen, using a process known as “exposing” the screen. The parts of the screen that are exposed to light will be hardened by exposure machine, while the areas covered by the design will remain soft and wash away, creating a stencil of the logo.
3. Printing:
The screen with the logo stencil is placed over the product, and ink is applied using a squeegee. The ink passes through the open areas of the screen, printing the logo onto the material.
4. Multiple Colors:
For multi-color logos, separate templates (screens) are created for each color, and each layer of color is printed one at a time.
In summary, a screen printing logo template is an essential part of the screen printing process, enabling precise, repeatable printing of a logo onto various products.
D What is silk screen emulsion?
In screen printing, emulsion is a light-sensitive coating applied to the screen mesh to create a stencil for printing a logo or design. It plays a crucial role in the process of transferring the logo template onto the screen.
1. Coating the Screen:
The screen is first coated evenly with a layer of emulsion. This emulsion is a photosensitive material that hardens when exposed to light.
2. Exposure to Light:
After the screen is coated with emulsion, a logo template (usually printed on a transparent film) is placed on the screen. The screen is then exposed to ultraviolet (UV) light or exposure machine. The light hardens the emulsion in the areas that are exposed, while the areas covered by the logo template remain soft and unexposed.
3. Washing Out:
After exposure, the screen is washed with water. The soft emulsion that was covered by the logo template washes away, leaving a stencil of the logo on the screen. This stencil allows ink to pass through the open areas during printing, transferring the logo onto the material.
4. Curing:
Once the screen is dried and the stencil is ready, it can be used for printing. The emulsion ensures that the logo will be sharp and precise, allowing for high-quality prints on the final product.
Emulsion is essential for creating precise and durable logos for screen printing. It ensures that your logo can be reproduced accurately on various materials like fabric, plastic, glass, wood, ceramic and metal.

E What is a Screen Printing Frame?
A screen printing frame (also known as a mesh frame) is a structure used to hold the mesh tightly in place during the screen printing process. The frame is typically made of wood or aluminum and is designed to be sturdy enough to support the mesh and withstand the pressure applied during printing.
Use Stretching Machine Stretching the Mesh onto the Frame
The process of stretching the mesh onto the frame involves carefully attaching the mesh (usually made of polyester or nylon) to the frame to ensure that it is taut and smooth. Here’s how it works:
1. Prepare the Frame:
The frame is first cleaned and prepared to hold the mesh. It is usually coated with a layer of adhesive or glue around the perimeter to secure the mesh.


2. Stretching the Mesh:
The mesh is then placed over the frame and pulled tightly to remove any wrinkles or slack. The tension must be evenly distributed across the mesh to ensure consistent printing results. This step is crucial for achieving high-quality prints with sharp details.


3. Securing the Mesh:
After the mesh is stretched tightly over the frame, it is stapled, glued, or clamped into place along the edges. The goal is to make sure the mesh is perfectly flat and taut, so there are no distortions or movement during the printing process.
Once the mesh is securely attached to the frame, it can be coated with emulsion, exposed to light to create the stencil (for logos or designs), and then used for printing.

Why is the Screen Printing Frame Important?
The frame and mesh are essential for screen printing because they:
1. Hold the mesh in a taut position for precise ink transfer.
2. Provide a stable surface for the stencil creation (emulsion).
3. Allow for consistent, high-quality prints on various substrates.
This is the process of stretching the mesh onto a frame and why the screen printing frame is an important tool in the overall screen printing process.
F Printing Logo
Below is the screen printed product LOGO
Click Below Learn More About One Color Semi Automatic Bottle Cup Screen Printer.