Contents
- 1 JST-R400-CSM Semi-Automatic Cylindrical Screen Printing Machine: How to Print Irregular Curved Soup Bowls with Perfect Registration
- 2 Machine at a Glance — JST-R400-CSM
- 3 Step 1: The Screen — Precision Stencil Preparation
- 4 Step 2: The Fixture — Custom CNC-Machined for Perfect Fit
- 5 Step 3: The Squeegee — Modified for Curved Surfaces
- 6 Step 4: Ink Preparation — Solvent or UV?
- 7 Step 5: The Blank Product — Before Printing
- 8 Step 6: The Printing Process — Watch It Live
- 9 Step 7: The Finished Product — Sharp, Clean, Perfectly Registered
- 10 Step 8: Post-Print Cleaning — Essential Maintenance
- 11 Why Choose the JST-R400-CSM for Your Production?
- 12 Frequently Asked Questions (FAQ)
- 13 You may also like
JST-R400-CSM Semi-Automatic Cylindrical Screen Printing Machine: How to Print Irregular Curved Soup Bowls with Perfect Registration
This article solves a critical production problem: ghosting, misregistration, and inconsistent prints on tapered cups, irregular soup bowls, and oval bottles. You’ll get a complete technical workflow — from custom fixture design and screen preparation to squeegee modification and multi-color sensor registration — all demonstrated with unedited footage and explained in real time by our English-speaking engineer.

Alan
🟢 Online now — replies within minutes
Hi, I’m Alan, Your Printing Solution Expert
Click my photo to chat on WhatsApp for a free quote or schedule a video factory tour now.
Struggling with inconsistent prints on tapered or irregularly curved soup bowls? The JST-R400-CSM semi-automatic cup screen printing machine solves this with mechanical precision — delivering up to 1,500 perfectly registered pieces per hour with ±0.1mm accuracy. And you can see it print your product live, guided by our English-speaking engineer.
In this demo, you’ll see:
- ✅ How we custom-machine a fixture to hold this irregular curved soup bowl
- ✅ The complete pre-press setup — screen, squeegee modification, and ink preparation
- ✅ Unedited footage of the machine running at full speed
- ✅ The final print result — and how you can see your own product printed on a live video call with our English-speaking engineer
Machine at a Glance — JST-R400-CSM
| Specification | Detail |
|---|---|
| Model | JST-R400-CSM |
| Operation | Semi-automatic (automatic printing + manual loading/unloading) |
| Max Screen Frame | 600 × 400 mm |
| Max Print Length | 400 mm |
| Max Print Diameter | 127 mm (full circle) / 254 mm (half circle) |
| Print Speed | 1,500 pcs/hour |
| Print Accuracy | ±0.1 mm |
| Control | PLC + Touch Screen |
| Color Capability | Single-color printing with multi-color overprint (2-10 colors via sensor registration) |
| Power | 220V/50Hz or 110V/60Hz, 2KW |
| Machine Size | 90 × 80 × 140 cm |
| Machine Weight | 205 kg |
Step-by-Step: Printing an Irregular Curved Soup Bowl
Step 1: The Screen — Precision Stencil Preparation
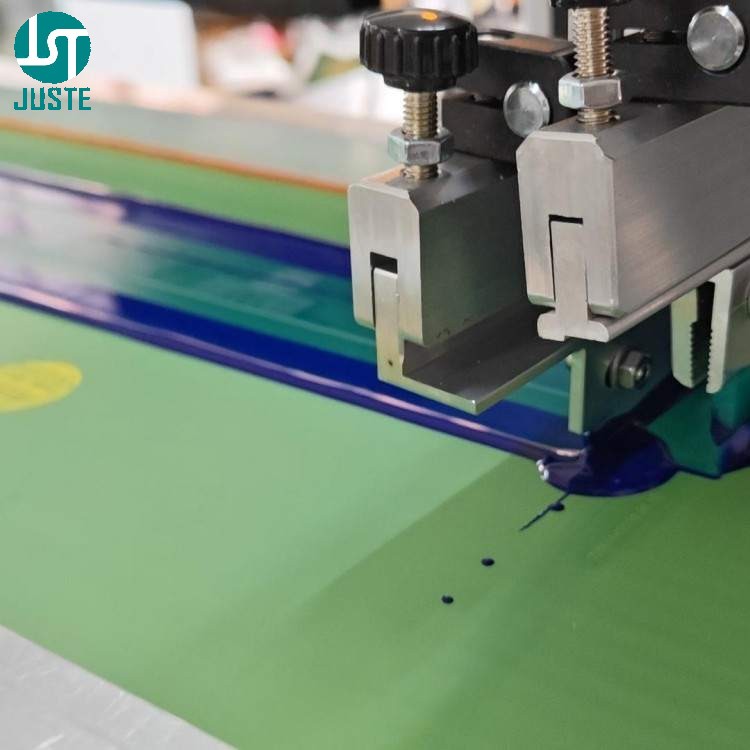
Every successful print starts with a high-quality screen. For this soup bowl, we created a custom stencil with the client’s logo design. The screen frame — max size 600 × 400 mm — is CNC-machined to ensure even tension across the mesh. Because uneven tension causes inconsistent ink deposits and blurred edges, therefore our CNC-machined frames guarantee uniform tension across the entire mesh surface — ensuring sharp, clean edges on every print.
Pro tip: The screen mesh selection depends on your ink type and desired ink deposit thickness. For soup bowls, a medium mesh count (around 120-150 threads/cm) works well for most solvent and UV inks.
Step 2: The Fixture — Custom CNC-Machined for Perfect Fit
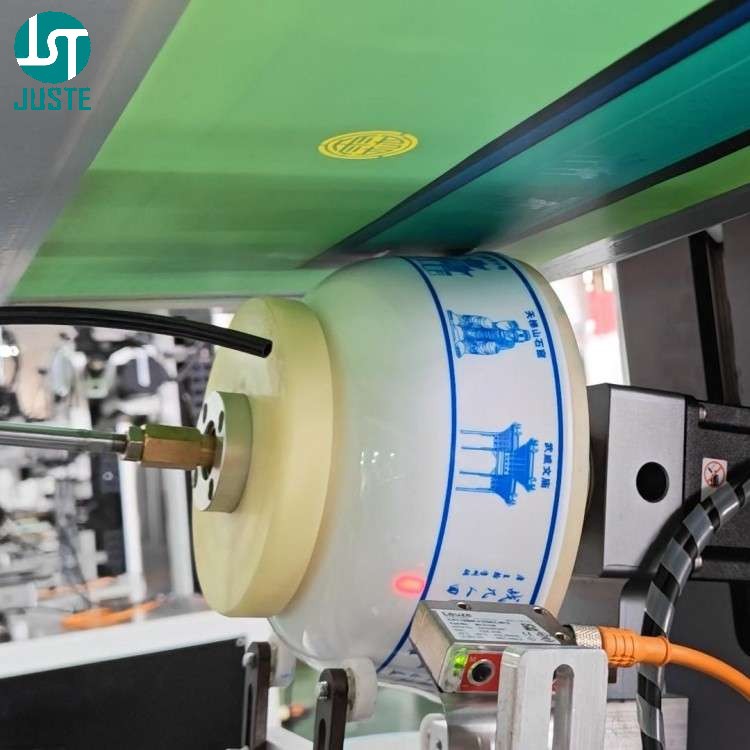
This is where the magic happens. The soup bowl has an irregular curved surface — not a perfect cylinder, but a tapered, curved shape. Standard fixtures won’t work.
Here’s what we did:
- Analyzed the bowl geometry — measured the curve, taper angle, and printing area
- CNC-machined a custom fixture in-house on our 10 high-precision CNC machining centers (±0.01 mm accuracy) — this ensures the bowl sits perfectly centered during rotation
- Verified alignment — the fixture ensures the printing surface is perfectly parallel to the screen plane, eliminating registration errors
Why this matters: A poorly fitted fixture causes the product to wobble during rotation, leading to blurred edges, inconsistent print position, and wasted material. In contrast, our custom CNC-machined fixture provides three-point stable support that holds the bowl firmly throughout the printing cycle — eliminating the micro-movements that cause ghosting and registration errors. According to industry practice, fixture precision is the single most critical factor in curved surface screen printing; without it, even the best machine cannot deliver consistent results.
🔹 Trust Signal: Our 10 CNC machining centers (±0.01 mm accuracy) allow us to custom-machine fixtures for your specific product — no matter how irregular the shape. Watch our English-speaking engineer explain the fixture design process on a live video call.
Step 3: The Squeegee — Modified for Curved Surfaces
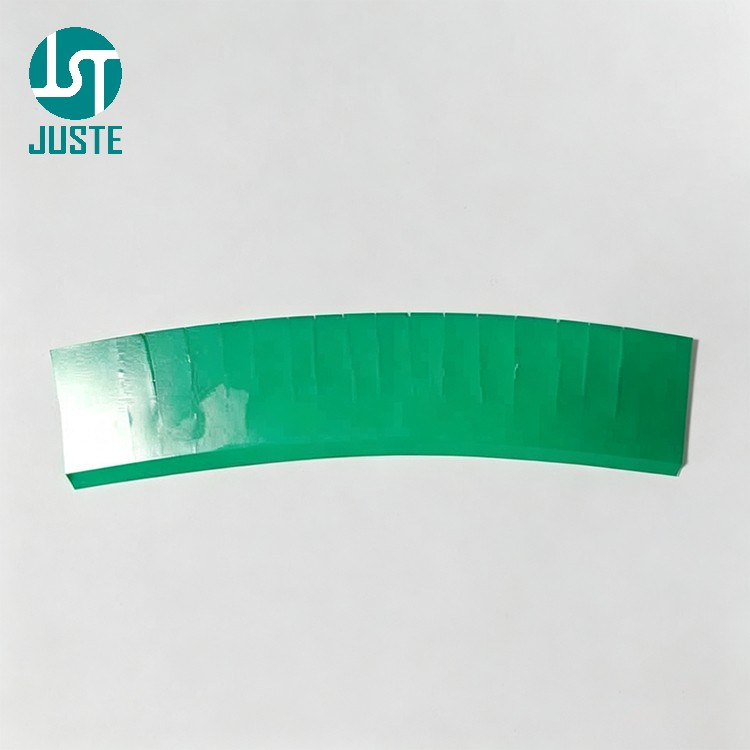
A standard straight squeegee won’t conform to an irregular curved surface. Here’s the fix:
- Cut small notches on the back of the squeegee — this allows it to bend
- Pressed the squeegee against the bowl surface to create a custom curve
- The squeegee now perfectly matches the bowl’s printing surface contour
The result? Even ink pressure across the entire print area — eliminating light spots, heavy spots, and uneven ink deposits — delivering a clean, uniform print.
Squeegee specifications available:
- Length: 1-4 meters (customizable)
- Common sizes: 25×5 cm, 40×7 cm, 50×9 cm
- Blade shapes: Flat, pointed, angled
- Hardness: 55° to 90° Shore (choose based on your ink and substrate)
Step 4: Ink Preparation — Solvent or UV?
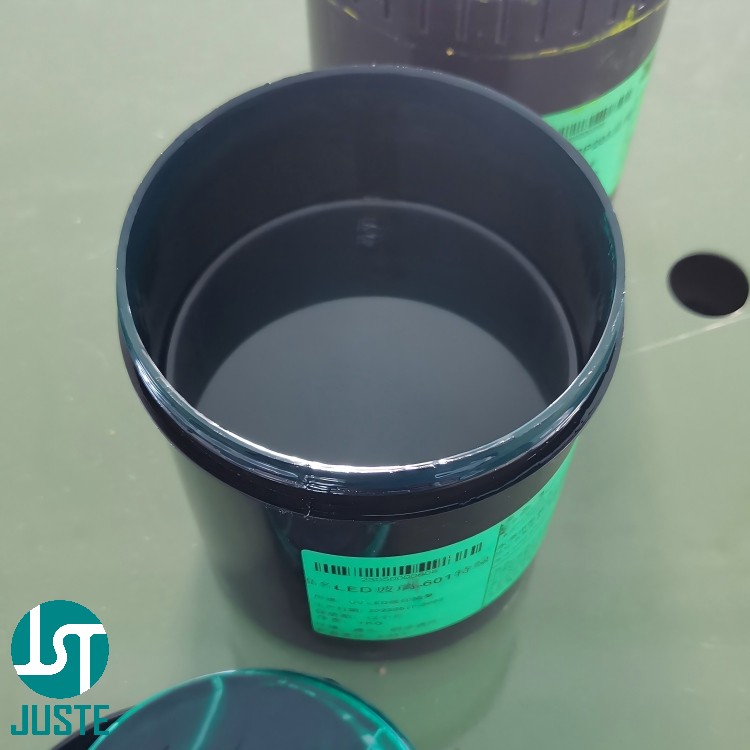
For this soup bowl demo, we used solvent-based ink — it’s widely available, cost-effective, and air-dries without additional equipment.
Your ink options:
- Solvent ink — Air dries; suitable for most plastic, glass, and metal substrates
- UV ink — Requires a UV curing oven (sold separately); offers instant curing, higher durability, and works on difficult substrates
Special note for cold beverage applications: If you’re printing on cups or bowls that will be used with ice-cold drinks, standard solvent inks may fail because conventional inks become brittle at low temperatures, causing the ink to crack and peel when ice is added. To solve this, we recommend low-temperature resistant PP screen printing ink — it maintains adhesion from -38°C to +100°C, ensuring your logo stays intact even in icy conditions. Contact us for specific ink recommendations.
Surface preparation note: For non-polar plastics like PP and PE, surface treatment (flame or corona) is essential for ink adhesion. For glass and metal, simple degreasing and cleaning suffice. For this soup bowl (ceramic/glass-like surface), we cleaned thoroughly with a degreaser before printing.
Step 5: The Blank Product — Before Printing
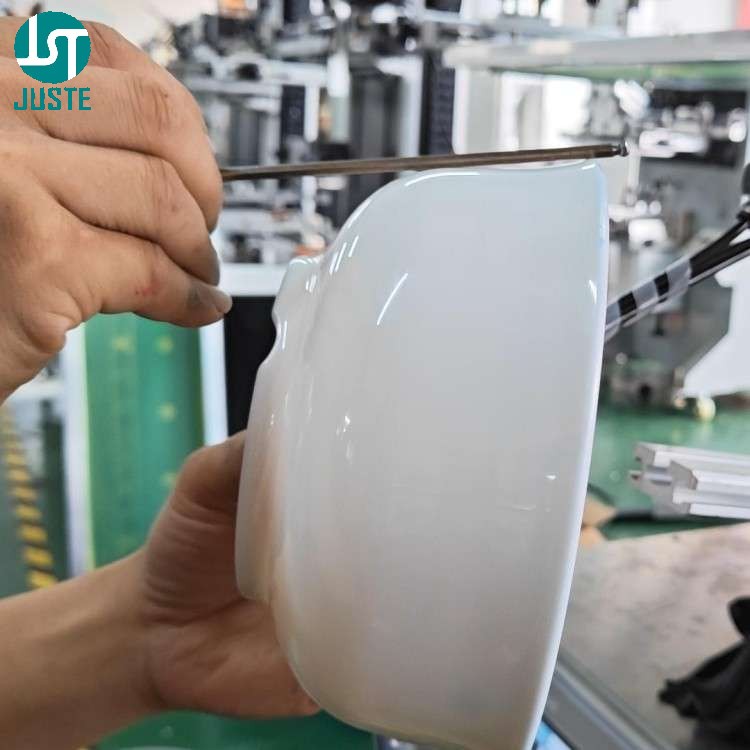
The blank soup bowl — clean, untreated, and ready for printing. Notice the irregular curved surface. This is what makes the process challenging — and what makes the JST-R400-CSM the right tool for the job.
Pre-print checklist:
- ✅ Bowl surface cleaned and degreased
- ✅ Custom fixture installed and aligned
- ✅ Screen mounted and registered
- ✅ Squeegee modified to match curve
- ✅ Ink mixed to correct viscosity
Step 6: The Printing Process — Watch It Live
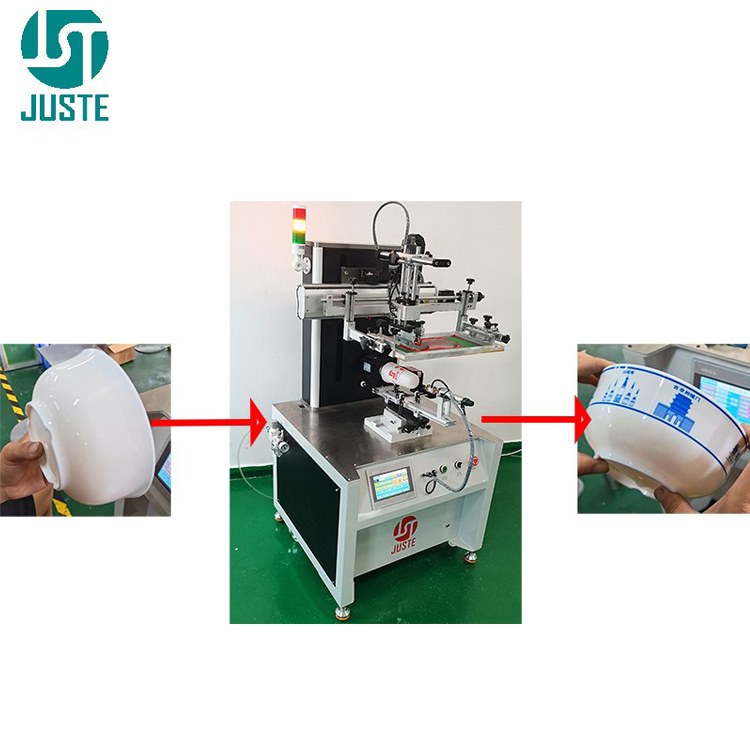
Here’s the actual printing sequence:
- Manual loading — Operator places the bowl onto the custom fixture
- Positioning — LEUZE color sensor detects the registration mark (for multi-color overprint)
- Foot switch activation — Operator steps on the foot switch to start the print cycle
- Automatic printing — The servo motor drives the screen frame left and right while the rotary servo motor rotates the bowl in synchronization
- Squeegee action — The pneumatic squeegee presses down, forcing ink through the mesh onto the bowl surface
- Print complete — The screen returns to home position
- Manual unloading — Operator removes the printed bowl
The entire cycle takes just seconds — at 1,500 pcs/hour, that’s about 2.4 seconds per bowl.
🔹 Watch the unedited video: This is the same process our English-speaking engineers will walk you through on a private video call. No cuts, no edits — just real production speed and real print quality.
Step 7: The Finished Product — Sharp, Clean, Perfectly Registered
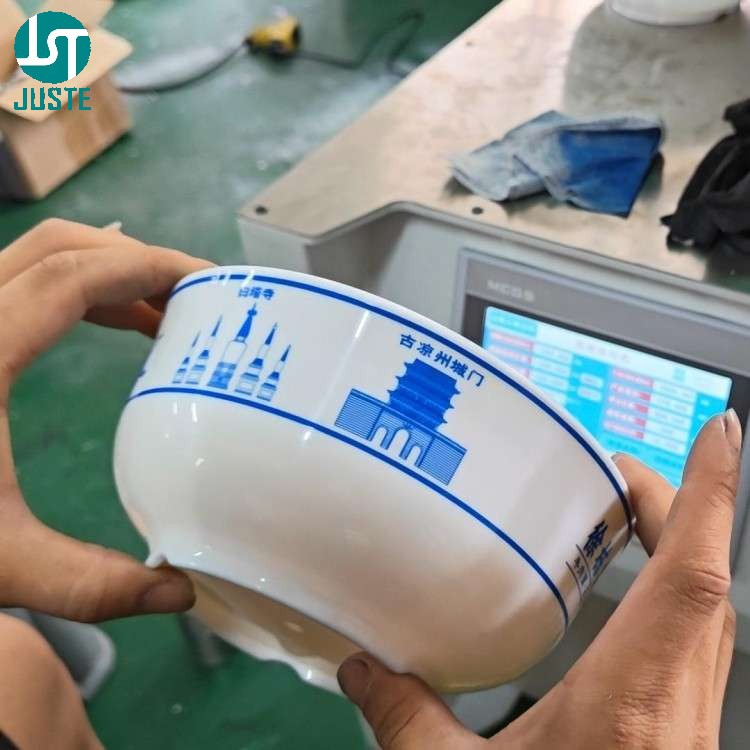
The result? A crisp, high-opacity print with:
- Sharp edges — no bleeding or blurring
- Perfect registration — the logo is exactly where it should be
- Consistent ink deposit — even coverage across the curved surface
- Durable finish — solvent ink bonds well with the bowl surface
Multi-color capability: This machine supports 2-10 color overprint using the LEUZE contrast sensor for precise registration. Each color prints separately — the sensor ensures perfect alignment for every subsequent color.
Step 8: Post-Print Cleaning — Essential Maintenance
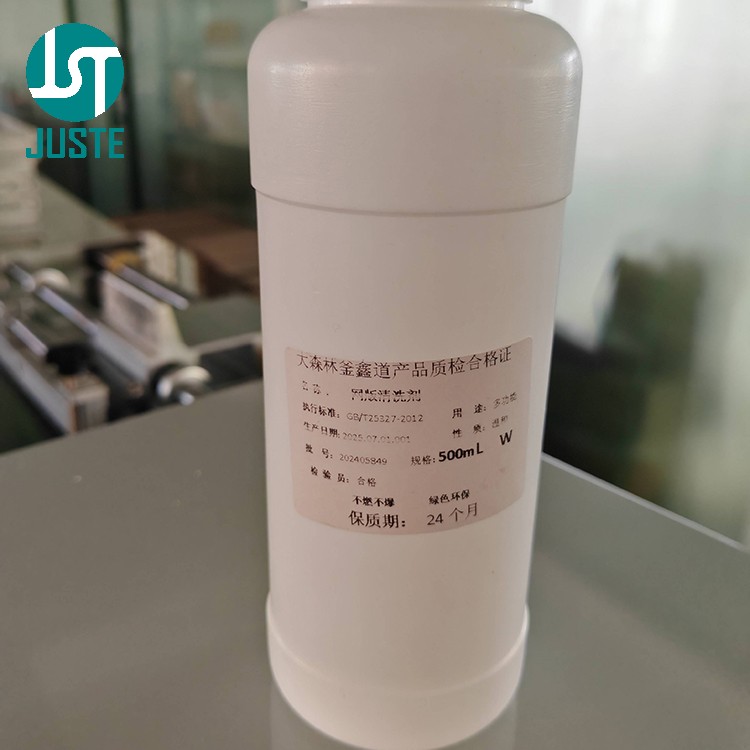
Never skip this step. After printing, you must clean the screen with screen wash (wash-off solution) to remove all ink residue. This:
- Prevents ink from drying in the mesh (which ruins the screen)
- Ensures consistent print quality for the next run
- Extends screen life significantly
Pro tip: For water-based or UV inks, use the appropriate cleaning solvent — using the wrong cleaner can damage the mesh tension or leave residues that affect future prints.
Proper storage: Once cleaned, store the screen flat in a dust-free environment — ready for the next production run.
Why Choose the JST-R400-CSM for Your Production?
| Feature | Benefit |
|---|---|
| Semi-automatic operation | One operator handles loading/unloading — no need for a full automation team |
| Servo motor drive | Precise, consistent movement for ±0.1 mm registration accuracy |
| LEUZE color sensor | Enables 2-10 color overprint with micro-registration precision |
| Custom CNC fixtures | We machine fixtures in-house for YOUR specific product shape |
| 1,500 pcs/hour speed | High output without compromising quality |
| Versatile material support | Plastic, glass, metal, ceramic, wood, and more |
| Touch screen PLC control | Easy operation, quick setup, and parameter storage |
| Mobile design | Caster wheels and vibration-damping feet for flexible workspace layout |
Frequently Asked Questions (FAQ)
Q: Are you a manufacturer or a trading company?
A: We are a direct manufacturer. Shenzhen Juste Machine Co., Ltd. has been designing and building industrial printing equipment since 2013. We operate a 9,000+ m² factory with 10 CNC machining centers (±0.01 mm accuracy). Every machine is designed, manufactured, assembled, tested, and supported in-house. Book a live video factory tour with our English-speaking sales team to see for yourself.
Q: Can this machine print on my specific product — like tapered cups or oval bottles?
A: Yes, it can. The JST-R400-CSM handles cylindrical, conical, oval, and irregular curved surfaces — including soup bowls, tapered cups, oval bottles, and more. The key is the custom fixture. We CNC-machine fixtures in-house to match your exact product geometry. Send us your product sample — we’ll machine a fixture and run a free print test on a live video call with our English-speaking engineer.
Q: Why does my printed logo peel off when I add ice to the cup?
A: This happens because standard inks become brittle at low temperatures, losing adhesion. For cold beverage applications, we recommend low-temperature resistant PP ink that stays flexible and maintains adhesion from -38°C to +100°C. Contact us for specific ink recommendations and a free test on your product.
Q: My prints have ghosting or blurry edges — what’s causing it?
A: Ghosting usually comes from two sources: fixture instability (the product moves during printing) or uneven squeegee pressure. Our JST-R400-CSM solves both with three-point stable fixtures and servo-driven synchronized motion that eliminate micro-movements. Schedule a video call with our engineer to diagnose your specific issue.
Q: Do I need different fixtures for 4oz, 8oz, 12oz, and 32oz cups?
A: Yes — because 4oz to 32oz cups differ dramatically in diameter, taper angle, and height, each size requires a custom-machined fixture for proper support. We design and machine fixtures in-house for every size you need. Send us your cup sizes — we’ll quote the fixture set for your full product line.
Q: Why is your price higher than some other suppliers?
A: Because you’re paying for performance, reliability, and transparency. We use premium components: HIWIN guide rails, SMC solenoid valves, AIRTAC cylinders, and LEUZE sensors. Every machine undergoes 48-hour continuous production testing before shipment. We export to 120+ countries — our reputation is built on quality, not the lowest price. Let’s calculate your ROI based on your production volume — schedule a video consultation with our engineer.
Q: Do your engineers speak English? Can we communicate without a translator?
A: Yes — this is one of our core differentiators. Our 20-year PLC engineer and 15-year mechanical design engineer both speak fluent English. Our sales team is also fluent in English. You can ask technical questions directly — no translators, no miscommunication. Book a 15-minute video call with our engineer — he’ll answer your questions in fluent English, in real time.
Q: Is this machine difficult to set up and maintain?
A: No, it’s designed for ease of use. The touch screen PLC control makes operation intuitive. We provide comprehensive manuals and remote video support. Our team guides you through setup step by step — and our after-sales support is available for the lifetime of the machine. Schedule a setup demonstration with our English-speaking support team.
Q: Can I see the machine printing my product before I pay?
A: Absolutely — and we encourage this. Free live video demo: Send us your blank product samples. We’ll custom-machine a fixture, run a full print test, and go live on video — our English-speaking engineer shows you everything in real time. You see the actual print quality before you commit. Request your free sample print test and live video demo today.
Q: Can I inspect my machine before it ships?
A: Yes. Before shipment, we perform a pre-shipment video inspection with you. We walk through every configuration detail, show you the 48-hour test results, and confirm everything meets your specifications. You know exactly what’s in the crate before it leaves our factory. Request a pre-shipment video inspection when you place your order.
Q: What warranty and technical support do you offer?
A: 1-year warranty with free replacement parts, lifetime technical support, and worldwide spare parts express shipping. Our English-speaking support team is available for remote diagnostics and video guidance. Contact us for detailed warranty terms and support options.
Your Product, Same Process — See It Live, In Fluent English
You’ve just watched a recorded demo. Now imagine getting a private, real-time video walkthrough of your own product being printed, guided by our 20-year PLC engineer — all in fluent English, with zero communication barriers.
- 🔹 Step 1: Send us your design file (Adobe Illustrator vector preferred) and a few blank product samples
- 🔹 Step 2: We’ll custom-machine a fixture and run your print test — just like we did with this soup bowl
- 🔹 Step 3: We go live on video — our English-speaking engineer shows you everything, answers your technical questions on the spot, and you see the final print result in real time
There is zero risk. If you’re not 100% convinced, you walk away with no obligation. And before shipping, we’ll do a pre-shipment video inspection with you, so you know exactly what’s in the crate.
Not sure which screen printing machine fits your product? Need a custom fixture for an irregular shape?
👇 Click my photo below to chat with me directly on WhatsApp — I’ll send you a free tailored quote within 8 hours.
Alan
🟢 Online now — replies within minutes
Hi, I’m Alan, Your Printing Solution Expert
Click my photo to chat on WhatsApp for a free quote or schedule a video factory tour now.
Ready to Get Your Custom Printing Solution?
Whether you’re printing soup bowls, tapered cups, or oval bottles, the JST-R400-CSM semi-automatic cup screen printing machine delivers precision, speed, and reliability. And with our free live video demo, you can see your own product printed before you commit — guided by an English-speaking engineer who answers your questions in real time.
Contact us today to request your free sample print test and live video demo.
📧 Email: Alan@justcig.com
💬 WhatsApp: Click to chat with Alan on WhatsApp(opens in new tab)
🌐 Website: www.justemachine.com(opens in new tab)