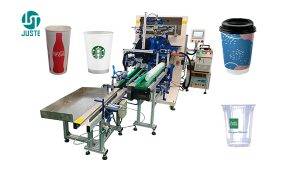
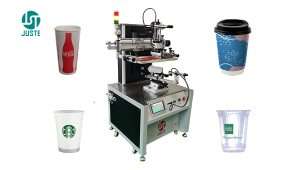
Cylindrical Plastic Part Screen Printing Machine: How to Print Perfect Logos on Round Containers
Struggling with inconsistent print registration on cylindrical plastic parts, glass bottles, or metal containers? The JST-R300-ACSM fully automatic cylindrical screen printing machine solves this with servo-driven precision — delivering 1600–1800 perfectly printed pieces per hour across plastic, glass, metal, and paper substrates. And you can see it print your actual product live, guided by our English-speaking engineer, before you commit a single dollar.
In this guide, you’ll learn:
- ✅ How the machine’s non-stackable feeding system handles cylindrical products that other printers can’t automate — from pen holders to sports water bottles
- ✅ 7-step workflow from manual loading to IR curing, with real unedited footage
- ✅ 5 common printing problems solved — including ink adhesion on glass, cold-temperature peeling, and registration ghosting
- ✅ How to get a free live video demo with our engineer printing your product — plastic, glass, or metal
Contents
Why This Machine Exists: Solving the “Non-Stackable” Problem
Cylindrical products — whether plastic bottles, glass jars, or metal containers — share one frustrating characteristic: they cannot be stacked. Unlike tapered cups that nest inside each other, true cylindrical shapes must be handled individually. This makes automation notoriously difficult.
The JST-R300-ACSM was custom-modified to solve exactly this problem. Our engineers replaced the standard conical cup handling system with a push-rod feeding mechanism and servo-driven turntable that gently handles non-stackable cylindrical products one by one — at 1600–1800 pieces per hour.
Technical Specifications at a Glance
| Feature | Specification |
|---|---|
| Model | JST-R300-ACSM |
| Print Color | One Color (multi-color optional) |
| Supported Materials | Plastic (PP/PET/PVC), Glass, Metal, Paper |
| Max Printing Length | 200 × 300 mm |
| Max Printing Diameter | Full circle 100 mm / Half circle 200 mm (customizable) |
| Min Printing Diameter | 30 mm (3 cm) |
| Printing Speed | 1600–1800 Pcs/H |
| Control System | Touchscreen PLC |
| Drive Type | Servo motor + Pneumatic |
| Machine Size | L245 × W150 × H155 CM (with IR curing line) |
| Power | 220V/50HZ or 110V/60HZ, 5KW |
| Machine Weight | 460 kg (530 kg with wooden box) |
Why these specifications matter to your production: The 30–100mm diameter range covers most cylindrical consumer packaging — from lipstick tubes to sports bottles. The 1600–1800 Pcs/H output means you can fulfill medium-to-large orders with consistent quality, while the multi-material compatibility (plastic, glass, metal, paper) makes this a versatile investment for factories producing across different product lines.
Talk to Our Engineers Directly — No translators, no delays. Our 20-year PLC engineer speaks fluent English and will answer your technical questions live on a video call, from setup to maintenance.
Key Advantages for B2B Buyers
| Advantage | What It Means for You |
|---|---|
| Non-Stackable Product Expert | Custom push-rod feeding system handles plastic bottles, glass jars, and metal containers that can’t be stacked — unlike standard conical cup printers |
| Multi-Material Compatibility | Print on plastic (PP/PET/PVC), glass, metal, and paper with the same machine. Our engineers recommend the right ink + curing combo for each material |
| 1600–1800 Pcs/H Output | High-volume production with stable ±0.1mm registration accuracy — verified by 48-hour burn-in test before shipment |
| Servo-Driven Precision | High-speed servo motor ensures perfect rotation synchronization, eliminating ghosting and registration drift |
| PLC Touchscreen Control | User-friendly interface with stored recipes for different product sizes — changeover in minutes, not hours |
| Built-in IR Curing Tunnel | Integrated drying system for plastisol inks on plastic/paper; UV curing available as optional upgrade for glass and metal applications |
| In-House CNC Fixturing | We custom-machine fixtures for each product (4oz–32oz) using 10 CNC centers (±0.01mm accuracy) — perfect fit = no wobble = no ghosting |
| 48-Hour Burn-In Test | Every machine runs continuously for 48 hours before shipping — we don’t ship problems, we ship solutions |
The 7-Step Printing Workflow
Step 1: Cylindrical Products Awaiting Printing
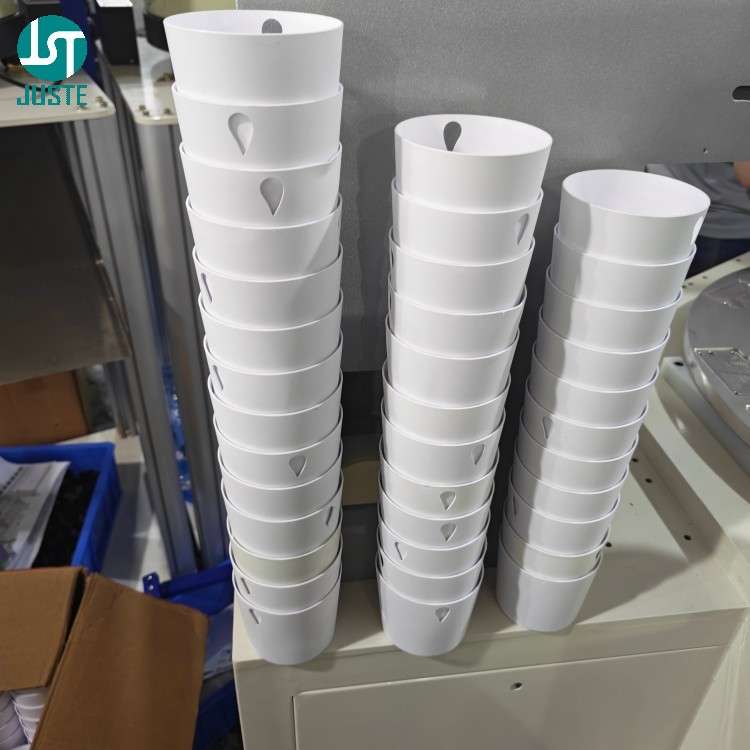
The process begins with your cylindrical products — whether plastic, glass, or metal — placed on the feeding rack.
Because true cylindrical products cannot be stacked like tapered cups (they have no taper to nest into), therefore each piece must be individually positioned on the conveyor. This is the only manual step in the entire process — a deliberate design choice that ensures every product is handled gently and prevents the scratching or chipping that automated bulk feeders often cause on glass and metal surfaces.
Step 2: Feeding Conveyor — Operator Loads Cylindrical Products
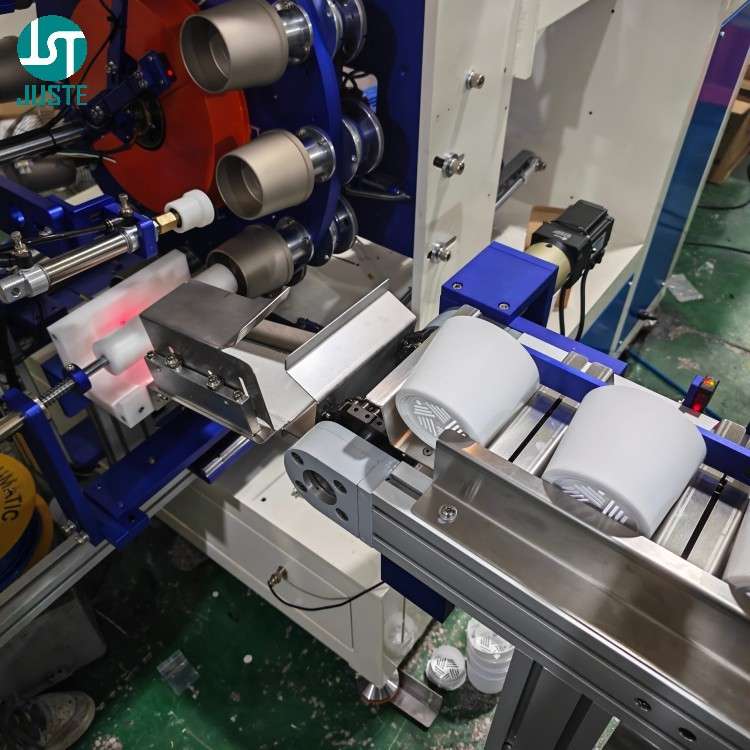
The operator manually places each cylindrical product onto the feeding conveyor belt — the single manual intervention in the entire workflow.
Since cylindrical products have no flat stacking surface, therefore they cannot be automatically hopper-fed like cups or vials. By designing this single manual loading step into the workflow, we ensure maximum automation elsewhere while avoiding the cost and complexity of custom bulk feeders that often damage delicate glass or coated metal surfaces.
The machine supports a wide diameter range — from 30 mm to 100 mm (full circle) / 200 mm (half circle) — which means you can run everything from small cosmetic jars to large sports bottles on the same platform.
Our English-speaking engineers can show you exactly how your specific products would run on this system during a free live video demo. Send us a sample — plastic, glass, or metal — and we’ll print it on camera for you.
Step 3: Loading Station — Push-Rod Feeds Non-Stackable Products to Turntable
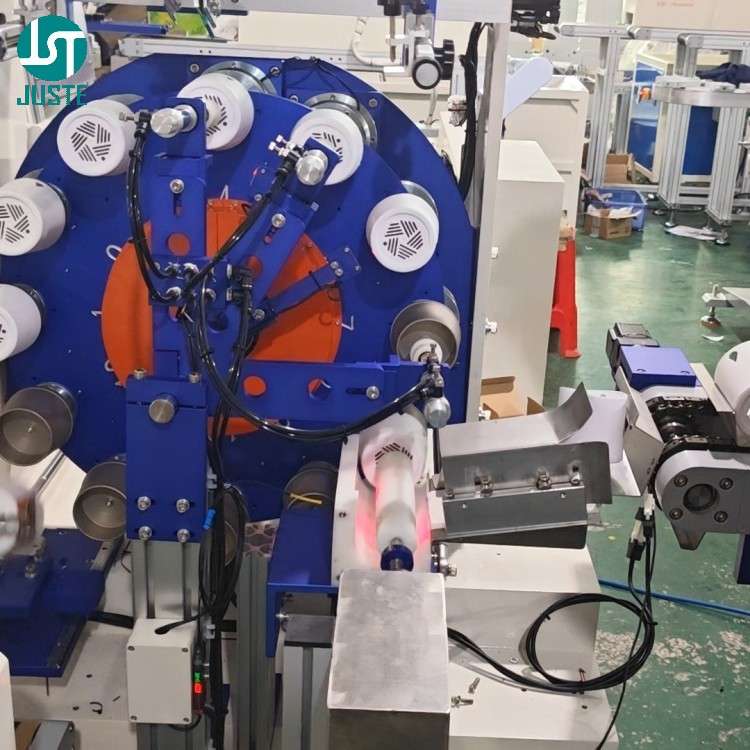
A cylindrical push-rod gently pushes each product onto the mold mounted on the convex divider (cam indexing drive) — this loading method is specifically engineered for non-stackable cylindrical products.
Because standard screen printers rely on gravity or simple slides for loading, therefore they struggle with true cylindrical shapes that roll unpredictably. By designing a push-rod mechanism that aligns each product horizontally, we ensure consistent positioning at every cycle, thus preventing misalignment that causes off-center prints or rejects.
We custom-machine fixtures for each product type and material using our in-house CNC workshop (10+ centers, ±0.01 mm accuracy). Since a 4oz bottle and a 32oz bottle have different diameters and wall thicknesses, therefore each requires a dedicated fixture. This ensures the product is held firmly during printing and prevents the micro-vibrations that cause ghosting and blurring.
⚠️ Common Problem: Print ghosting or blurring? This is often caused by insufficient fixture support. Our three-point contact fixture design eliminates product wobble. During your free live video call, our engineer will show you exactly how we match fixtures to your product dimensions.
During your free live video tour, our engineer will show you exactly how we design and machine these fixtures — all in fluent English, with no translation needed.
Step 4: Product Detection Sensor — No Product, No Print
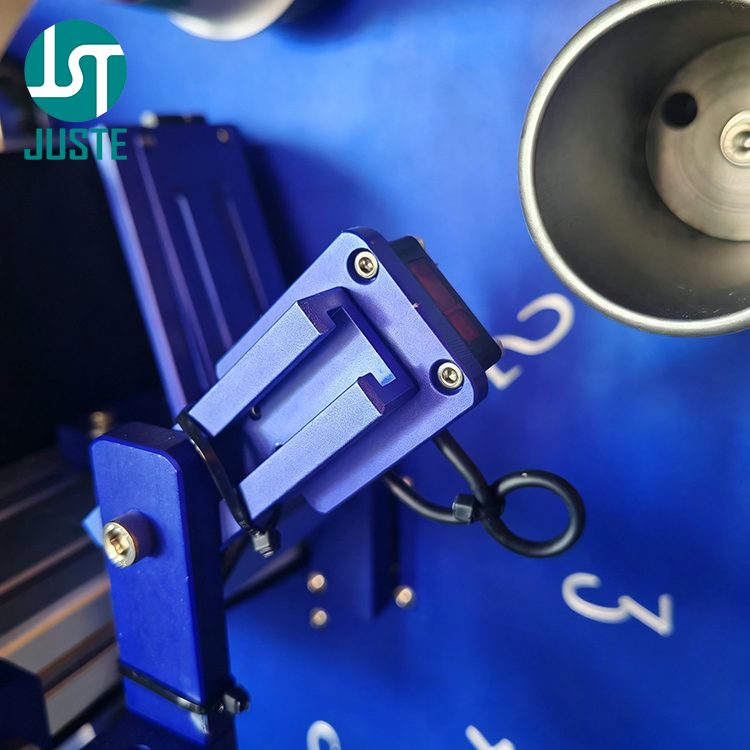
An optical sensor checks whether a cylindrical product is present on each fixture before printing begins.
If the sensor detects an empty fixture, then the machine immediately stops and triggers an alarm, waiting for operator inspection. This safety mechanism ensures the squeegee never prints directly onto the mold, thus preventing costly tooling damage and ink waste. Since replacement molds can cost hundreds of dollars and days of lead time, this single sensor pays for itself on the first avoided incident.
Step 5: Printing Station — Adjusting Stroke Length for Perfect Logo Placement
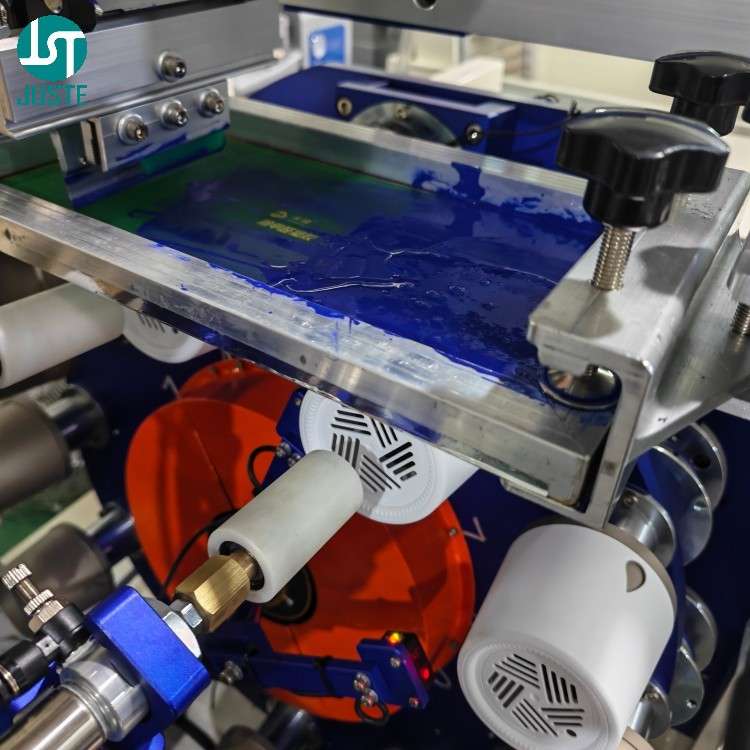
The printing stroke length must be precisely calibrated: greater than the logo width, but less than the product circumference at the printing position.
Because the squeegee transfers ink only during its forward stroke, therefore a stroke that’s too short will leave the logo incomplete. Conversely, a stroke that’s too long will overlap the print or waste ink on unnecessary travel. By calibrating the stroke to match your specific logo and product diameter, we ensure crisp, complete transfer on every cycle.
Since different materials — plastic, glass, metal — have different surface energies, therefore ink formulation and pre-treatment must be adjusted accordingly. Our engineers will guide you through these settings during your live video call.
⚠️ Common Problem: Logo prints with dots or pinholes? This often indicates incorrect squeegee pressure or contaminated screen mesh. Our 20-year PLC engineer will show you how to diagnose this during your live demo — in fluent English, with real-time troubleshooting.
Step 6: Unloading Station — Mechanical Arm Removes Finished Parts
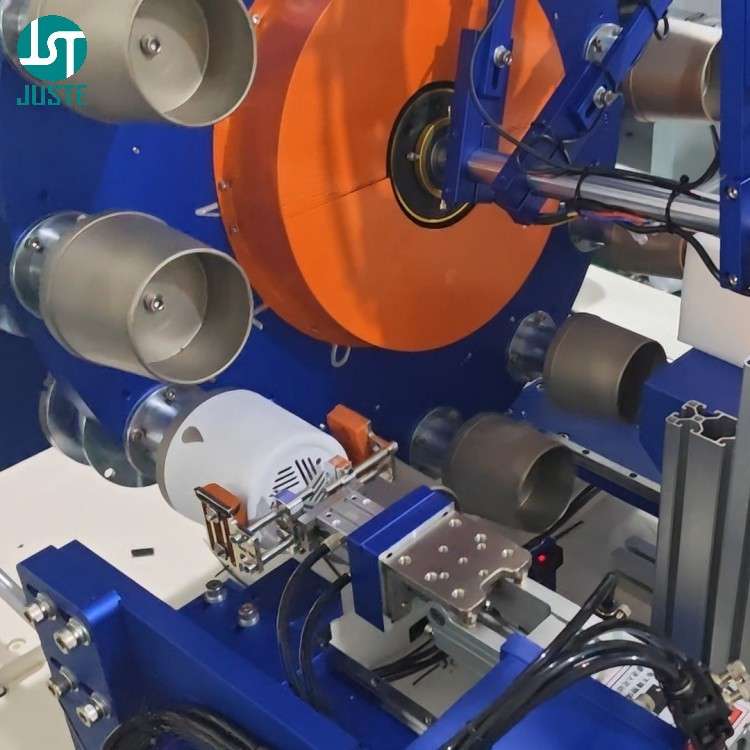
A servo-driven mechanical arm gently grips each finished product, pulls it from the fixture, and transfers it to the unloading conveyor.
Because freshly printed ink is still wet, therefore any manual handling would risk smudging. By automating the unloading process with precise servo control, we ensure zero contact with the printed area, thus preserving print quality from the moment it leaves the screen until curing is complete.
This is the same process our English-speaking engineers will walk you through on a private video call — with your actual products.
Step 7: IR Tunnel Oven — Curing the Printed Cylindrical Products
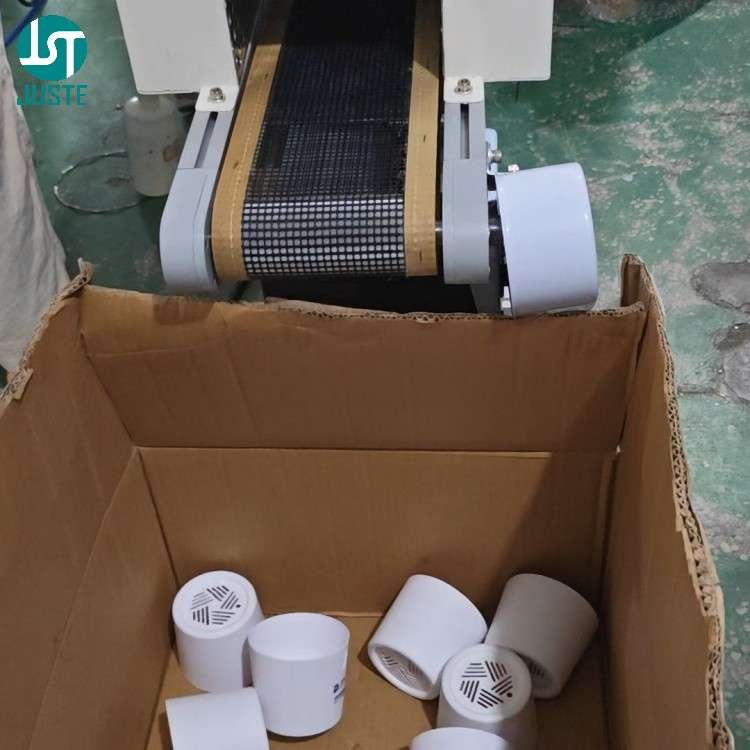
Printed products move through the built-in IR tunnel oven (approximately 2 meters long) where heat permanently bonds the ink to the surface.
For plastisol inks on plastic and paper, the IR tunnel provides consistent 150–180°C heat that ensures full polymerization and prevents ink cracking or peeling. For glass and metal applications, we recommend UV ink with an optional UV curing system — since UV curing happens in under one second, therefore it enables even faster production speeds and superior adhesion on non-porous surfaces.
⚠️ Common Problem: Logo peels off when ice is added to the cup? This happens because standard inks become brittle at low temperatures. For cold-drink applications, our engineers recommend low-temperature PP inks that maintain adhesion from -38°C to +100°C. We’ll show you the difference during your live video demo.
After curing, products are collected in a bin at the end of the conveyor — ready for packaging and shipping.
Send us a few blank samples — plastic, glass, or metal — and we’ll run a custom demo just for you.
Frequently Asked Questions (FAQ)
Q: Are you a manufacturer or a trading company?
A: We are a direct manufacturer — Shenzhen Juste Machine Co., Ltd. — established in 2013 with our own 9,000+ m² factory. We design, machine, assemble, and test every machine in-house. You’re buying directly from the source, not through a middleman. Every machine undergoes a 48-hour burn-in test before shipment — we don’t ship problems, we ship solutions.
Q: Can this machine print on my specific product — plastic, glass, or metal?
A: Yes — this machine is custom-modified for true cylindrical products made of plastic (PP/PET/PVC), glass, metal, and paper. It does not handle conical, oval, or flat shapes (we offer separate models for those). Send us a blank sample, and we’ll test-print it on video so you can see the results yourself. Our engineers will recommend the optimal ink + curing combination for your material.
Q: Why is your price higher than some other suppliers?
A: Because of what’s inside — HIWIN linear guides, SMC valves, and AIRTAC pneumatic components, not generic parts. Our machines undergo a 48-hour burn-in test before shipment. And our in-house CNC workshop (±0.01 mm accuracy) ensures fixture precision that lower-cost suppliers can’t match. As we often tell our clients in over 120 countries: you pay for what you don’t see — the reliability that keeps your production line running.
Q: Do your engineers speak English? Can we communicate without a translator?
A: Yes — absolutely. Our 20-year PLC engineer and our sales engineers all speak fluent English. We regularly conduct video calls where our engineers walk clients through machine setup, troubleshooting, and customizations — directly, with zero translation delays. No middleman. No miscommunication. Just clear, technical English.
Q: Why does my printed logo peel off when I add ice to the cup?
A: This happens because standard screen printing inks become brittle at low temperatures. For cold-drink applications, we recommend low-temperature PP inks that maintain adhesion from -38°C to +100°C. During your free live video demo, our engineer will show you the difference between standard and low-temperature inks on your actual product — and recommend the right solution for your production needs.
Q: Why does my printed logo have dots, pinholes, or look grainy?
A: Dots or pinholes usually indicate one of three issues: incorrect squeegee pressure, contaminated screen mesh, or improper ink viscosity. During your free live video call, our 20-year PLC engineer will diagnose the specific cause based on your setup and show you how to fix it — in fluent English, with real-time troubleshooting on the machine.
Q: Why do my prints have ghosting, blurring, or double images?
A: Ghosting is almost always caused by product movement during printing — usually insufficient fixture support or incorrect stroke pressure. Our three-point contact fixture design eliminates product wobble. Since we custom-machine every fixture for your specific product dimensions, therefore ghosting is virtually eliminated before it starts. Ask our engineer to show you the fixture design during your video demo.
Q: Can I see the machine printing my product before I pay?
A: Yes — and we insist on it. Send us a few blank samples — plastic, glass, or metal — and we’ll run a free test-print on video. Our English-speaking engineer will show you the entire process in real time — not a pre-recorded generic video. You’ll see your logo on your product, and you can ask technical questions as we go. It’s zero-risk, zero-obligation.
Q: Can I inspect my machine before it ships?
A: Absolutely. We offer a pre-shipment video inspection for every order. We’ll go live with you — walking through the machine, showing you the configuration, demonstrating that it meets all your specifications, and reviewing the 48-hour test report. You see exactly what’s going into the crate. And since our engineers speak fluent English, you can ask any question in real time.
Q: How do I clean the screen after printing? Does it require special care?
A: Yes — screen cleaning is essential for maintaining print quality. After each production run, use screen wash/cleaner to remove residual ink from the mesh. Because dried ink blocks the mesh openings, therefore regular cleaning prevents pinholes and incomplete prints. We recommend mesh open time of 5–10 minutes before cleaning for best results. Our engineer will demonstrate the complete cleaning procedure during your live handover — in fluent English, step by step.
Q: What warranty and technical support do you offer?
A: 1-year warranty with free replacement parts, plus lifetime technical support. Our engineers remain available even after the sale — via email, WhatsApp, or video call. Many of our clients have been with us for 5+ years because of this ongoing support. We don’t just sell machines; we build long-term partnerships.
Ready to Start Your Printing Business?
You’ve just walked through a full production cycle. Now imagine getting a private, real-time video walkthrough of your own cylindrical products being printed, guided by our 20-year PLC engineer — all in fluent English, with zero communication barriers.
Here’s how it works:
- 🔹 Step 1: Send us your design file and a few blank product samples — plastic, glass, or metal
- 🔹 Step 2: We custom-machine a fixture and run your print test
- 🔹 Step 3: We go live on video — our English-speaking engineer shows you everything, answers your technical questions on the spot, and you see the final print result in real time
There is zero risk. If you’re not 100% convinced, you walk away with no obligation. And before shipping, we’ll do a pre-shipment video inspection with you, so you know exactly what’s arriving at your facility.
Not sure if this cylindrical screen printing machine fits your pen holder, airtight food container, drinking cup, sports water bottle, humidifier, glass jar, or metal container production? Or need a custom fixture for your specific cylindrical product?
👇 Click Alan’s photo below to chat with him directly on WhatsApp — he’ll send you a free tailored quote within 8 hours.

Alan
🟢 Online now — replies within minutes
Hi, I’m Alan, Your Printing Solution Expert
Click my photo to chat on WhatsApp for a free quote or schedule a video factory tour now.
Or email Alan directly: Alan@justcig.com — we’ll respond within 24 hours with your customized printing solution.